When most people think of design they think of using a mouse (or pen if you’re really cool) to move elements on the screen to bring your dream to life. In other words, new designers do 99% of their work with just their dominant hand on the mouse.
If that’s you, you’re an amateur designer. Sorry, that’s just fact. And my guess is your design process is slow as hell.
In order to turn pro you need to get your other hand involved.
About 30% of all my input and commands into Photoshop come from the keyboard rather than the mouse. That means my left hand is constantly in use for switching between tools, modifying the function of the active tool, or just doing commands that would otherwise take a bunch of steps.
Shortcuts I use every day.
I could write a giant list of thousands of keyboard shortcuts, but then you wouldn’t know which ones are actually useful. So this is my short list of shortcuts you’ll actually use. If you have a favorite — or you’ve created one that is particularly clever — post a comment below.
Working with layers
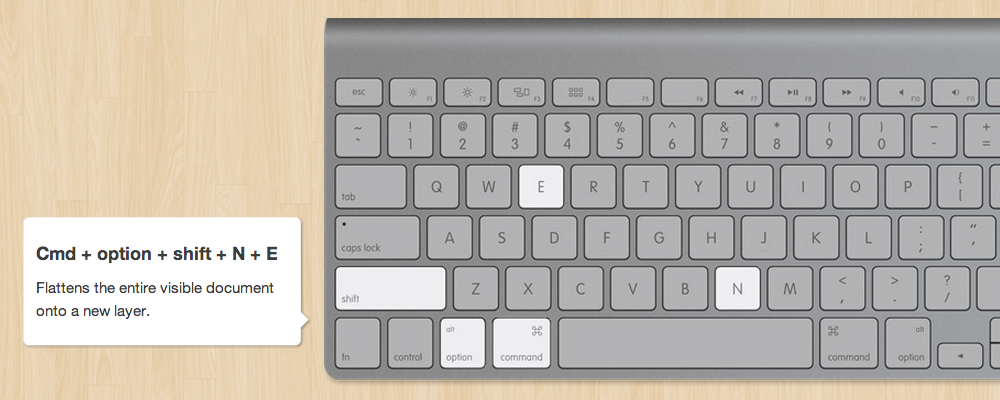
Cmd + Option + Shift + N + E
This is really two keyboard shortcuts in one, so you can do them separately, but together they make the longest shortcut I know, so I just have to include it. Let’s dissect this one to give you an idea of how keyboard shortcuts are created in Photoshop.
(N) looks like it should have something to do with “new”—and it does. Cmd+N creates a new document. Add shift in there (Cmd+shift+N) and it creates a new layer. Unfortunately this also throws up the new layer dialog, which I never use. So by adding the option key in there as well you can suppress that dialog and skip a step.
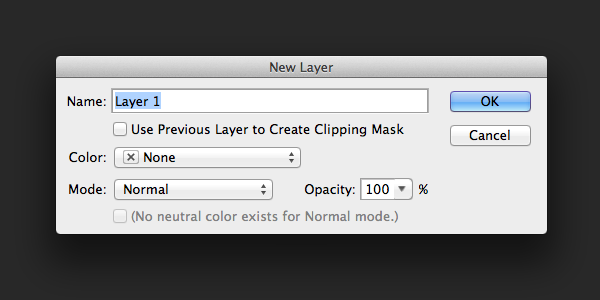
(Go away. No one wants you here.)
So the first part of that shortcut creates a new layer. What does the E do? When combined with Cmd and Option it creates a flattened version of your entire document on a single layer. This is handy for when you want to create a preview or selection of your design or for exporting shapes for the web.
Option + Click
Let’s say you created a texture, but you only want to apply it to a part of your image. You could mask or erase away the part you want to hide, or instead you could just clip it to a layer that has the right shape.
Simply hold down the option key and click in the space between the two layers. The top layer will clip to the bottom one!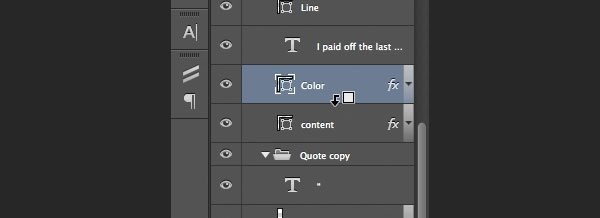
1,2,3,4… Opacity
Next time, instead of messing with the opacity slider to fade out a layer (which requires using the mouse), use your number keys instead. When your move tool is selected pressing 1 will set the opacity at 10%, 2 at 20%, and so on. 0 will set it back to 100%. If you want something more precise press two numbers quickly. Pressing 4 then 5 in rapid succession will set the opacity to 45%.
Cmd + J
When designing a complicated website or app interface you are going to end up with a ton of layers. Often the quickest way to create that next element is to duplicate your existing shape. You could drag a layer down to the new layer button, but it’s far quicker to just hit Cmd + J and duplicate the layer or group.
Cmd + G
Speaking of groups, even if you name your layers your documents are probably a huge mess. Use layer groups to organize layers and keep all the different sections of your design straight. Cmd + G will create a new group and if you have layers selected at the time, it will place the layers inside your new group.
Colors & Brushes
Brush sizes: “[” and “]”
If you do much work with brushes you need to change the size constantly. You can use your bracket keys to do that on the fly: “[” makes the brush smaller, and “]” makes it larger.
To change the hardness of the brush, hold down shift and press the bracket keys. They work in the same way.
Cmd + delete (backspace) / Option + Delete (backspace)
I never use the paint bucket tool. Seriously, I don’t think I’ve touched it in the last 5 years. Except for right now to check what it’s actually called.
Instead I press Option + Delete (backspace) to fill an area with my foreground color or Control + Delete to fill with my background color. Memorize that and it replaces an entire tool!
How to learn any shortcut
Alright, we’ve covered a few of my favorites—and we’ll have more in a minute — but now I want to show you how to learn them on your own. Anytime you find yourself performing an action a few times in a row or reaching for a common tool, I want you to stop and hover your cursor over it. All of the tools will show you want keyboard shortcut will pull them up.
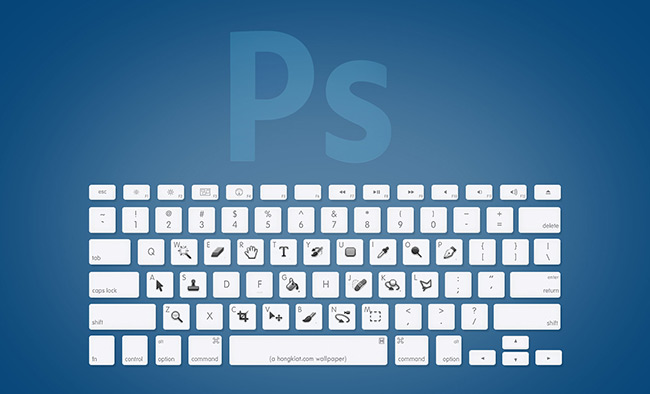
Source: hongkiat.com
Switching between tools is incredibly common. In fact, V is my most commonly used keyboard shortcut (to access the move tool). Just running down the list of tools and memorizing the key for each one will save you a ton of time.
Then, look in any of the menus for the keyboard shortcuts listed next to each item. If you look for them, the Photoshop interface will tell you the shortcut for just about everything.

Shift + Option + Cmd + S
That’s how I found the “Save for web” shortcut. It’s long (Shift + Option + Command + S), but really useful. That’s one I use about 10x per day.
Cmd + f
That’s also how I found Cmd + F which just runs the last used filter (like a blur). That can be helpful, but it’s made better by adding in the option key. That will bring up the last filter, but will also show you the options dialog so you can make changes before running it again.
How to make your own keyboard shortcuts
This list was meant to just get you started (and to get you thinking about how to use your non-mouse hand more frequently). However, there is so much more that is possible! Most importantly, you can create your own shortcuts.
If you go to Edit > Keyboard shortcuts (or press Cmd + Shift + Option + K) you can create your own set of shortcuts and change anything you like. Just be careful not to accidentally overwrite existing shortcuts (Photoshop will warn you first).
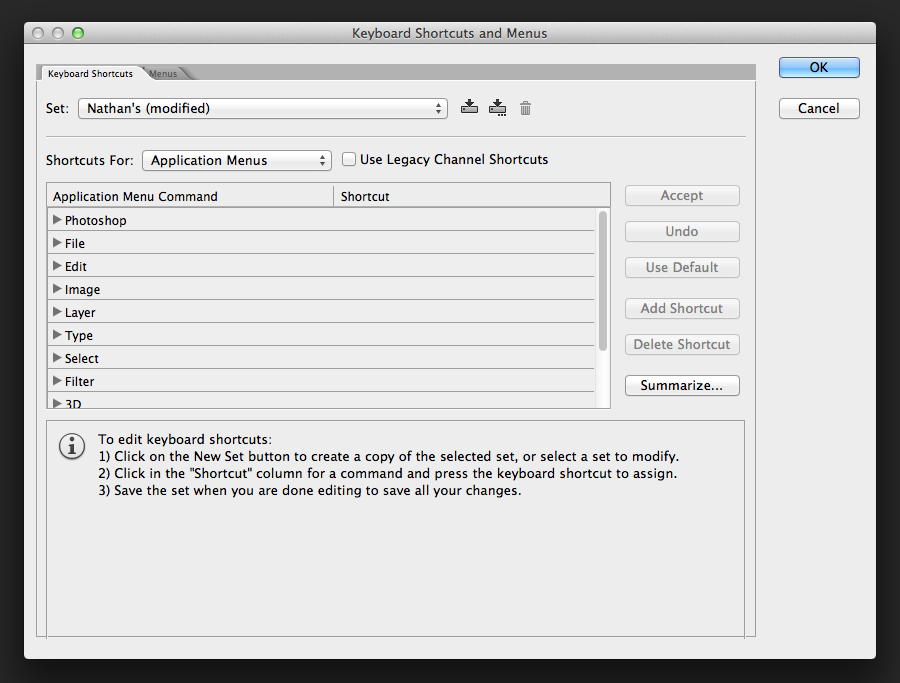
Creating actions
Keep in mind, some things can’t be done with keyboard shortcuts directly, but you can record an action instead.
If you do a lot of really precise design work (like icons), you want to turn the “Snap Vector Tools and Transforms to Pixel Grid” setting off and on. I recorded one action to turn this setting on and another action to turn it back off.
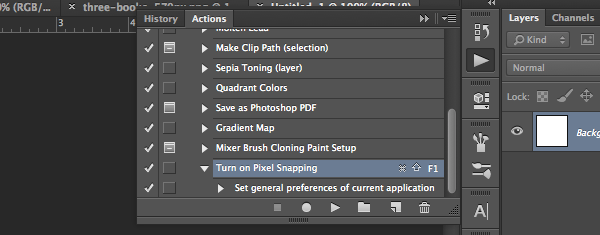
Recording an action is really simple. You just click to create a new action, hit record do the thing you want to automate (like click the checkbox) and then click stop. You can then assign a keyboard shortcut using Cmd, shift, and any of the function keys (like f1). So you could map Cmd + F1 to turn on ‘snap to pixels’ and Cmd + Shift + F1 to turn it back off.
Want to learn more?
If you like this and want to learn more design, I’ve got a great course just for you coming out next Tuesday. It’s called Photoshop for Web Design and teaches exactly what you need to know in Photoshop. I cut straight to web and interface design techniques that will save you time and skip over everything that doesn’t apply. (Which means you’ll get the best value for the time you spend with the course!)
Go here to learn more about Photoshop for Web Design.


Thanks Nathan! These are some great shortcuts… now I just have to force myself to get used to using them haha. They will definitely make my life way easier.
Another great post Nathan, but the sad fact for designers goes double for developers: between a good editor like Sublime Text, git, bash, css, bootstrap syntax and oh yeah, an actual programming language, If you want to get good, you’re going to need to memorize more shortcuts that you ever imagined.
And then, with the next version, you get to re-memorize, memorize more. Oh joy!
Keep these posts coming!
These are some good ones. I think the two I use the most are the toggles for showing grid and showing guides. Cmd + ‘ and CMD + ; respectively. Good post Nathan.
These shortcut are really helpful. Can you post some shortcuts for windows version! That would be your kindness.
Thank you!
A few nice ones in there that I didn’t know about. I also discovered in trying your tips that holing down OPTION while dragging a layer will create a duplicate copy (just like your CMD+J) tip.
+1 for windows versions, the company I’m currently contracting at is a locked down MS shop.
Nathan! Fantastic post and very helpful for designers to save time and work faster. Thx for sharing
Hey Umair,
For Windows the keys line up like so:
Cmd (mac) = Ctrl (windows)
Option (mac) = Alt (windows)
hope that helps.
These shortcut are really great. Anything you can do these days to save time is always a great thing since everyone is so busy.
Thank you! I tend to use a lot of keyboard shortcuts too–rasterizing, merging and such. This is extremely helpful. Thank you!
Good reminders, all around! I had completely forgotten you can create your own shortcuts. A lot of times I will also create my own action sets to help speed up jobs that involve a lot of similar production work.
I enjoy a lot of the content lately both on the blog and int he mailing list, though I think we should be careful as creative professionals in furthering the misconception that knowing how to use Photoshop makes you a designer. Skills vs tools. While I don’t think this article is doing that, the recent newsletter that came a few days ago felt a little bit like it was offering to enable anyone with the skills to design just by teaching them Photoshop, which I don’t think was your intention. Rather, you are looking to enable people to help themselves, which is great! Just a delivery.wording type of thing I think we all need to watch out for, I think.