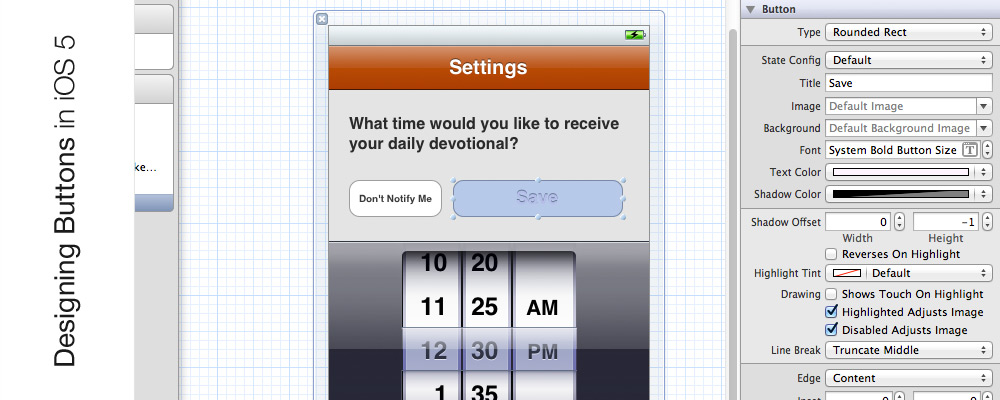
By default Apple provides well styled interface elements to use when designing your application. Except for the UIButtons. To me using any other stock element is fine, but nothing screams amateur design like a default UIButton.
In my iOS apps I’ve tried a couple different methods of styling these buttons to get a more desirable look. While I know you can design buttons entirely in code, my Photoshop skills greatly exceed my programming skills. So my buttons are all designed in Photoshop, then imported as PNG files. Also iOS does such a good job with PNG optimization that I see it as the best choice.
Option 1: Using an Exactly Sized Image
![]()
 UIImage *buttonImage = [UIImage imageNamed:@"orangeButton.png"];
 UIImage *buttonImageHighlight = [UIImage imageNamed:@"orangeButtonHighlight.png"];
 // Set the background for any states you plan to use
 [saveButton setBackgroundImage:buttonImage forState:UIControlStateNormal];
 [saveButton setBackgroundImage:buttonImageHighlight forState:UIControlStateHighlighted];
You can also do this in Interface Builder by setting the button Type to “Custom” and then add the image name to the background property.
Option 2: Using resizableImageWithCapInsets (iOS 5 Only)
This is my current preferred method (in most cases). It allows me to use the same images for most of the buttons across an application.
 UIImage *buttonImage = [[UIImage imageNamed:@"orangeButton.png"]
 resizableImageWithCapInsets:UIEdgeInsetsMake(18, 18, 18, 18)];
 UIImage *buttonImageHighlight = [[UIImage imageNamed:@"orangeButtonHighlight.png"]
 resizableImageWithCapInsets:UIEdgeInsetsMake(18, 18, 18, 18)];
 // Set the background for any states you plan to use
 [saveButton setBackgroundImage:buttonImage forState:UIControlStateNormal]
;
 [saveButton setBackgroundImage:buttonImageHighlight forState:UIControlStateHighlighted];
Pretty straightforward. Here you can change the button dimensions without having to create a new image. In Interface Builder (or with code) you will need to set the titleLabel color as well as the shadow position and color.
Final Tips:
- Leave the text out of your images. This will scale better for the retina display and allow you to change it dynamically. No one wants to have to open Photoshop just to tweak some button text.
- Always include @2x versions of each image.
- If you prefer most of the customization (color, background, shadow) can be done in Interface Builder. Writing it in code is only required if you are using the second method (resizableImageWithCapInsets).
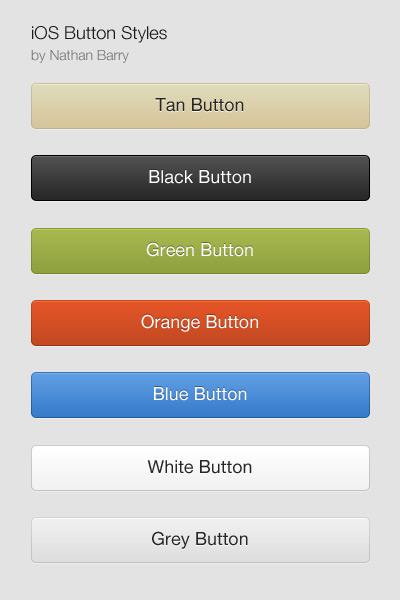
Whichever method you prefer, you can use some of my sample button styles to get started. Both methods still seem rough, so I would appreciate feedback and ways to better create buttons.
Signup for my iOS Design Newsletter for more app design tips and articles.


Thanks!
Thank you!! Really helpful! :)
Hi,
Thanks for the information – much appreciated.
I would be highly grateful if you could briefly list the steps you undertake to create the buttons in photoshop. As I am just starting out I am using GIMP but can’t seem to find a tutorial to make the simple, clean and crisp buttons that you provided. If you can list some brief steps I would be grateful as I will try and replicate in GIMP.
thanks,
Rishad
Good article. This looks much easier albeit more tedious than i thought. As an iOS newb could you please explain a little more about including 2X images? Where do I save them? Is there a naming convention?
The naming convention is just sameFileName@2x.png. Other than the @2x portion the name needs to be exactly the same. As for linking the file just drop it anywhere in your Xcode project. It will be less confusing later if you put it in the same place as your standard resolution file.
Hope that helps!
Thanks! :)
I made these a little easier to drop into a project, might be useful for anyone trying out these buttons : https://github.com/stuartkhall/iOS-Buttons
Thank you, I found this helpful!
Do you know how to use resizableImageWithCapInsets BUT have it resize at the caps? I have an image I want to stretch at the ends across the screen to fit the width. The center element being a perfect circle which will house an icon.
Hi,
Thanks for the tutorial.
The buttons given away, what is the license on it? Is it okay to use for paid apps?
Also, could you please do a tutorial on using UIAppearance to customize different UI elements (with & without images).
Thanks.
Use them for anything you want. No need for credit links.
Thanks a lot :)
Thank you, lovely buttons! First time I actually used resizable background images on iOS too, works really well.
Can you please specify the EdgeInsets for @2x images?
Thanks
Great looking buttons! Thanks.
Hey man thanks for the tut, im really new at this, can you tell me where am I supposed to add the code for the buttons? thank you.
Thank you. They really look nice.
Hi
Can you also do the second method (Option 2: Using resizableImageWithCapInsets (iOS 5 Only) from the interface builder?
It stretches the image in my attempt
Regards
Chris
Thanks for the images! What are the RGB values for the orange color?
save my day!
thanks!
Thanks for sharing!
BTW, hese work also great when using as the background of a UITableViewCell in Grouped mode. Because they are images with a rounded rect, they don’t look as nice in Plain UITableViews, unfortunately.
Awesome, thanks so much! I can’t believe Apple doesn’t provide something like this with the framework.
Hi,
really cool buttons. What about the license? Can I use your buttons for a product?
THX!,
Jan
Thanks for sharing the background images. It makes it a lot easier to customize the UIButtons that have the same look for both iOS 6 and iOS 7. Will use them in the next release of our app. Hopefully it won’t be a problem.
Cheers.